The A2P quickstart is the fastest way to get approved for business texting in the US. It collects your business details in a single form, then registers your brand and your first campaign with the carriers for you. You won't need to learn what a brand or a campaign is, and you won't deal with the carriers directly.
This guide covers the eligibility questions, what the form asks for, and what happens after you submit.
This is the only path to a brand
Every workspace registers its business this way. There's no separate brand wizard, and no advanced mode to switch into: resuming a saved draft and fixing a carrier rejection reopen this same form with your answers already in it. The one thing you can still do by hand is write your own campaign, covered in A2P registration.
Starting the quickstart#
You'll need a plan that includes texting
A2P registration isn't available during a free trial, or on Solo, so those workspaces can't text from a US local number. Texting starts on the Team plan. Start one before you register.
Go to Settings → A2P Compliance and click Get started on the Set up business texting card. You'll also see prompts in a few other places:
- Right after you buy a US phone number
- In the message composer, when texting is blocked on a number
- From the A2P registration required badge on a US local number's card, which takes you to Settings → A2P Compliance
Checking your eligibility first#
Before any form opens, dialnote asks up to two questions to work out which registration you qualify for. Each answer reveals the next step, so this takes seconds.
Question 1: Do you have a business tax ID? In the US that's an EIN. In Canada it's a BN-9, in India a CIN, and other countries vary.
If you answer no, you'll get Question 2: Do you have a US or Canadian address and mobile number? Your mobile has to be from a traditional carrier. VoIP numbers, including dialnote numbers, won't work because you'll get a one-time verification text.
What you'll qualify for#
| Registered business | Sole proprietor | |
|---|---|---|
| Shown in the form as | Low Volume Business | Sole Proprietor |
| Requires | A tax ID issued 30+ days ago | US or Canadian address plus a carrier mobile number |
| Numbers that can text US customers | No app limit | 1 |
| Campaigns | 3 | 1 |
| Carrier daily limit | Around 2,000 messages | Around 1,000 messages |
| Messages per second | 15 | 1 |
Registered businesses register at the carriers' Low-Volume Standard tier, which is where the "Low Volume Business" label comes from. Higher volume needs extra carrier vetting and goes through support.
Both paths cost the same, so if you have a tax ID, register as a business. You'll get more numbers and more volume for the same fee.
If you answer no to both questions, US carriers can't approve you through self-serve registration. The triage screen offers Contact support, and our team can walk you through the options for your business.
Daily limits are per brand, not per campaign
The carrier limit applies to your whole registration. A registered business gets around 2,000 messages a day total, whether it runs one campaign or three. Normal message rates apply on top of the registration fees.
Filling in the form#
The quickstart is one form split into a few short steps. What you see depends on which path you qualified for.
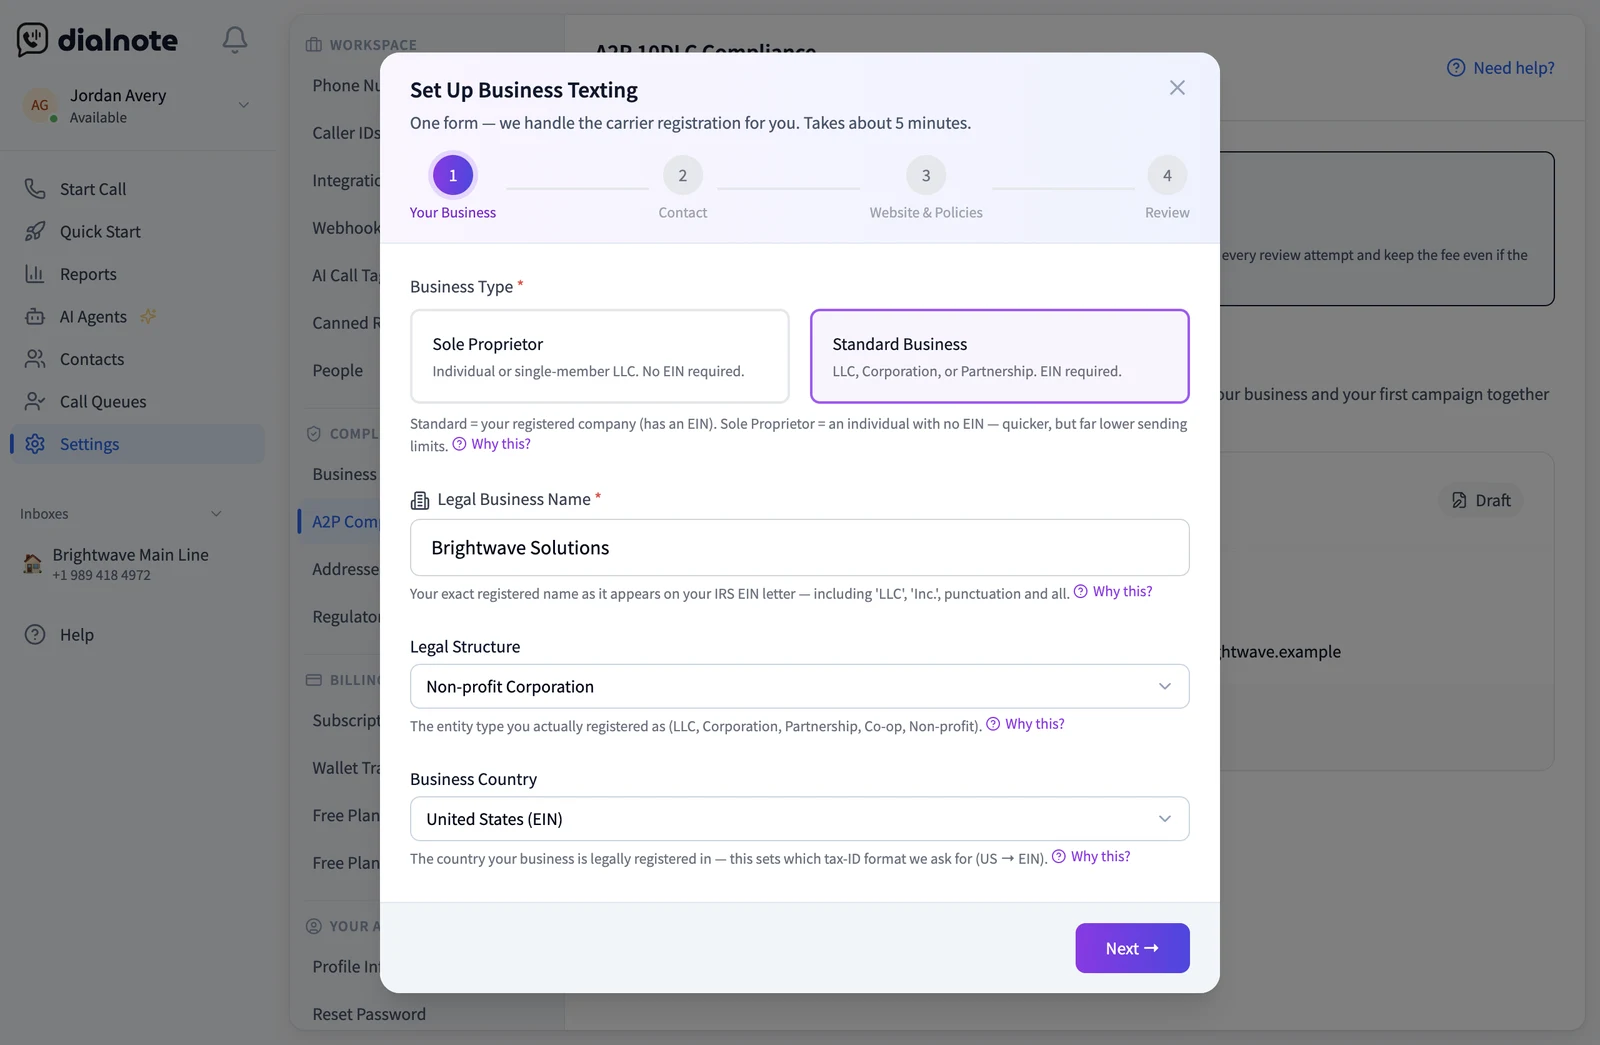
| Step | What it asks for |
|---|---|
| 1. Your Business | Legal business name exactly as it appears on your IRS EIN letter, legal structure, business country and tax ID (registered businesses only), a business contact email, and your registered business address. The business type picker only shows if you reopen the form without going through the eligibility questions |
| 2. Contact | Business industry, regions of operation, company type (private, public, non-profit or government), and an authorized representative: a real person who can vouch for the registration, with name, email, phone in E.164 format, job position, and business title |
| 3. Website & Policies | Your website URL, publicly reachable rather than behind a login (optional for sole proprietors), your privacy policy URL, and your terms and conditions URL. Carriers check that the policy says you don't sell personal data to third parties |
| 4. Review | Confirm everything, then pay and submit |
Sole proprietors get 3 steps instead of 4: the mobile number you verify by text doubles as your contact, so step 2 is skipped.
dialnote pre-fills what it already knows from your account, so a lot of this is confirming rather than typing, and most fields have a Why this? link explaining what carriers do with it.
The form itself doesn't save as you go
Nothing is submitted to the carriers until the last step, and the quickstart doesn't save your progress partway through. Closing it mid-form discards what you typed, so set aside a few minutes and finish in one sitting.
Details you've already saved under Settings → Business Details are a different thing: those pre-fill any blank fields in the form for you. They don't show up as a Draft on the dashboard. A Draft only appears once you've submitted the form and haven't finished paying (or dialnote's review is holding it), and you pick it back up with Continue registration.
You won't write campaign descriptions or sample messages. dialnote generates that content for you from your business details.
Paying#
The review step shows what's due before you commit. Submitting opens a secure hosted checkout where you pay the $19.50 registration fee by card. After that, the $2.00 monthly fee per approved campaign is debited from your dialnote wallet, so keep a balance on it.
The full breakdown, including what's free and what happens on a rejection, is on what A2P registration costs.
After you submit#
This is the part the quickstart handles for you. Once payment clears, dialnote runs the whole pipeline and advances each stage as the carriers respond:
- Brand verification. Your business identity goes to the carriers. Sole proprietors also get a one-time verification text on the mobile number they gave.
- Campaign submission. As soon as the brand is approved, dialnote submits your campaign automatically.
- Number attach. Once the campaign is approved, your eligible US local numbers are added to its sender pool so they can actually deliver messages. Registered businesses get all of them; sole proprietors get exactly one, because carriers cap them there.
Before anything goes to the carriers, dialnote reviews your application itself. If it finds a problem, it holds the registration and lists what to fix (or asks you to accept warnings) on the Business texting card. This can happen before checkout, when nothing's charged yet, or after payment.
If you registered as a business, numbers you buy later are attached automatically too, so you don't have to come back here after every purchase. A sole-proprietor campaign already holds its one number, so numbers you buy later can't text US customers.
Watch progress on the Business texting card in Settings → A2P Compliance. You don't need to come back and click anything between stages.
Approval takes time
Brand verification usually takes 1 to 5 business days. Campaign vetting takes 7 to 21 days after that. You can't send business texts on a US number until the campaign is approved, so start registration well before you need it.
If your brand gets rejected, the card shows the carrier's reason and a Fix & resubmit button (Edit & resubmit when the fix is an identity appeal to support). If your campaign gets rejected, its status card shows the reason with tips for fixing it, and you edit and resubmit it from the Messaging Campaigns section. Resubmitting is free.
Coming back to the form#
Fix & resubmit and Continue registration reopen this same form with everything you already entered, so you're only correcting the fields the carriers flagged.
Once your details are with the carriers, they're greyed out instead of editable. Changing them at that point wouldn't reach the carriers anyway, so the form shows them read-only rather than letting you type into fields that get discarded. Business details stay editable while your registration is a Draft, Failed or Rejected, and lock from Submitting onwards. Your terms and conditions URL is the exception: it belongs to the campaign, not your business identity, so it stays editable.
Next steps#
- What A2P registration costs - fees, refunds, and monthly billing
- A2P registration - statuses, campaign limits, and how registration works underneath
- Sending SMS - start texting once your campaign is approved
- Compliance overview - how A2P fits with regulatory bundles and recording consent