Quick Start Guide
After signing up for dialnote, you'll land on the Quick Start page—your personalized guide to getting everything set up. This page tracks your progress and recommends what to do next based on your business needs.
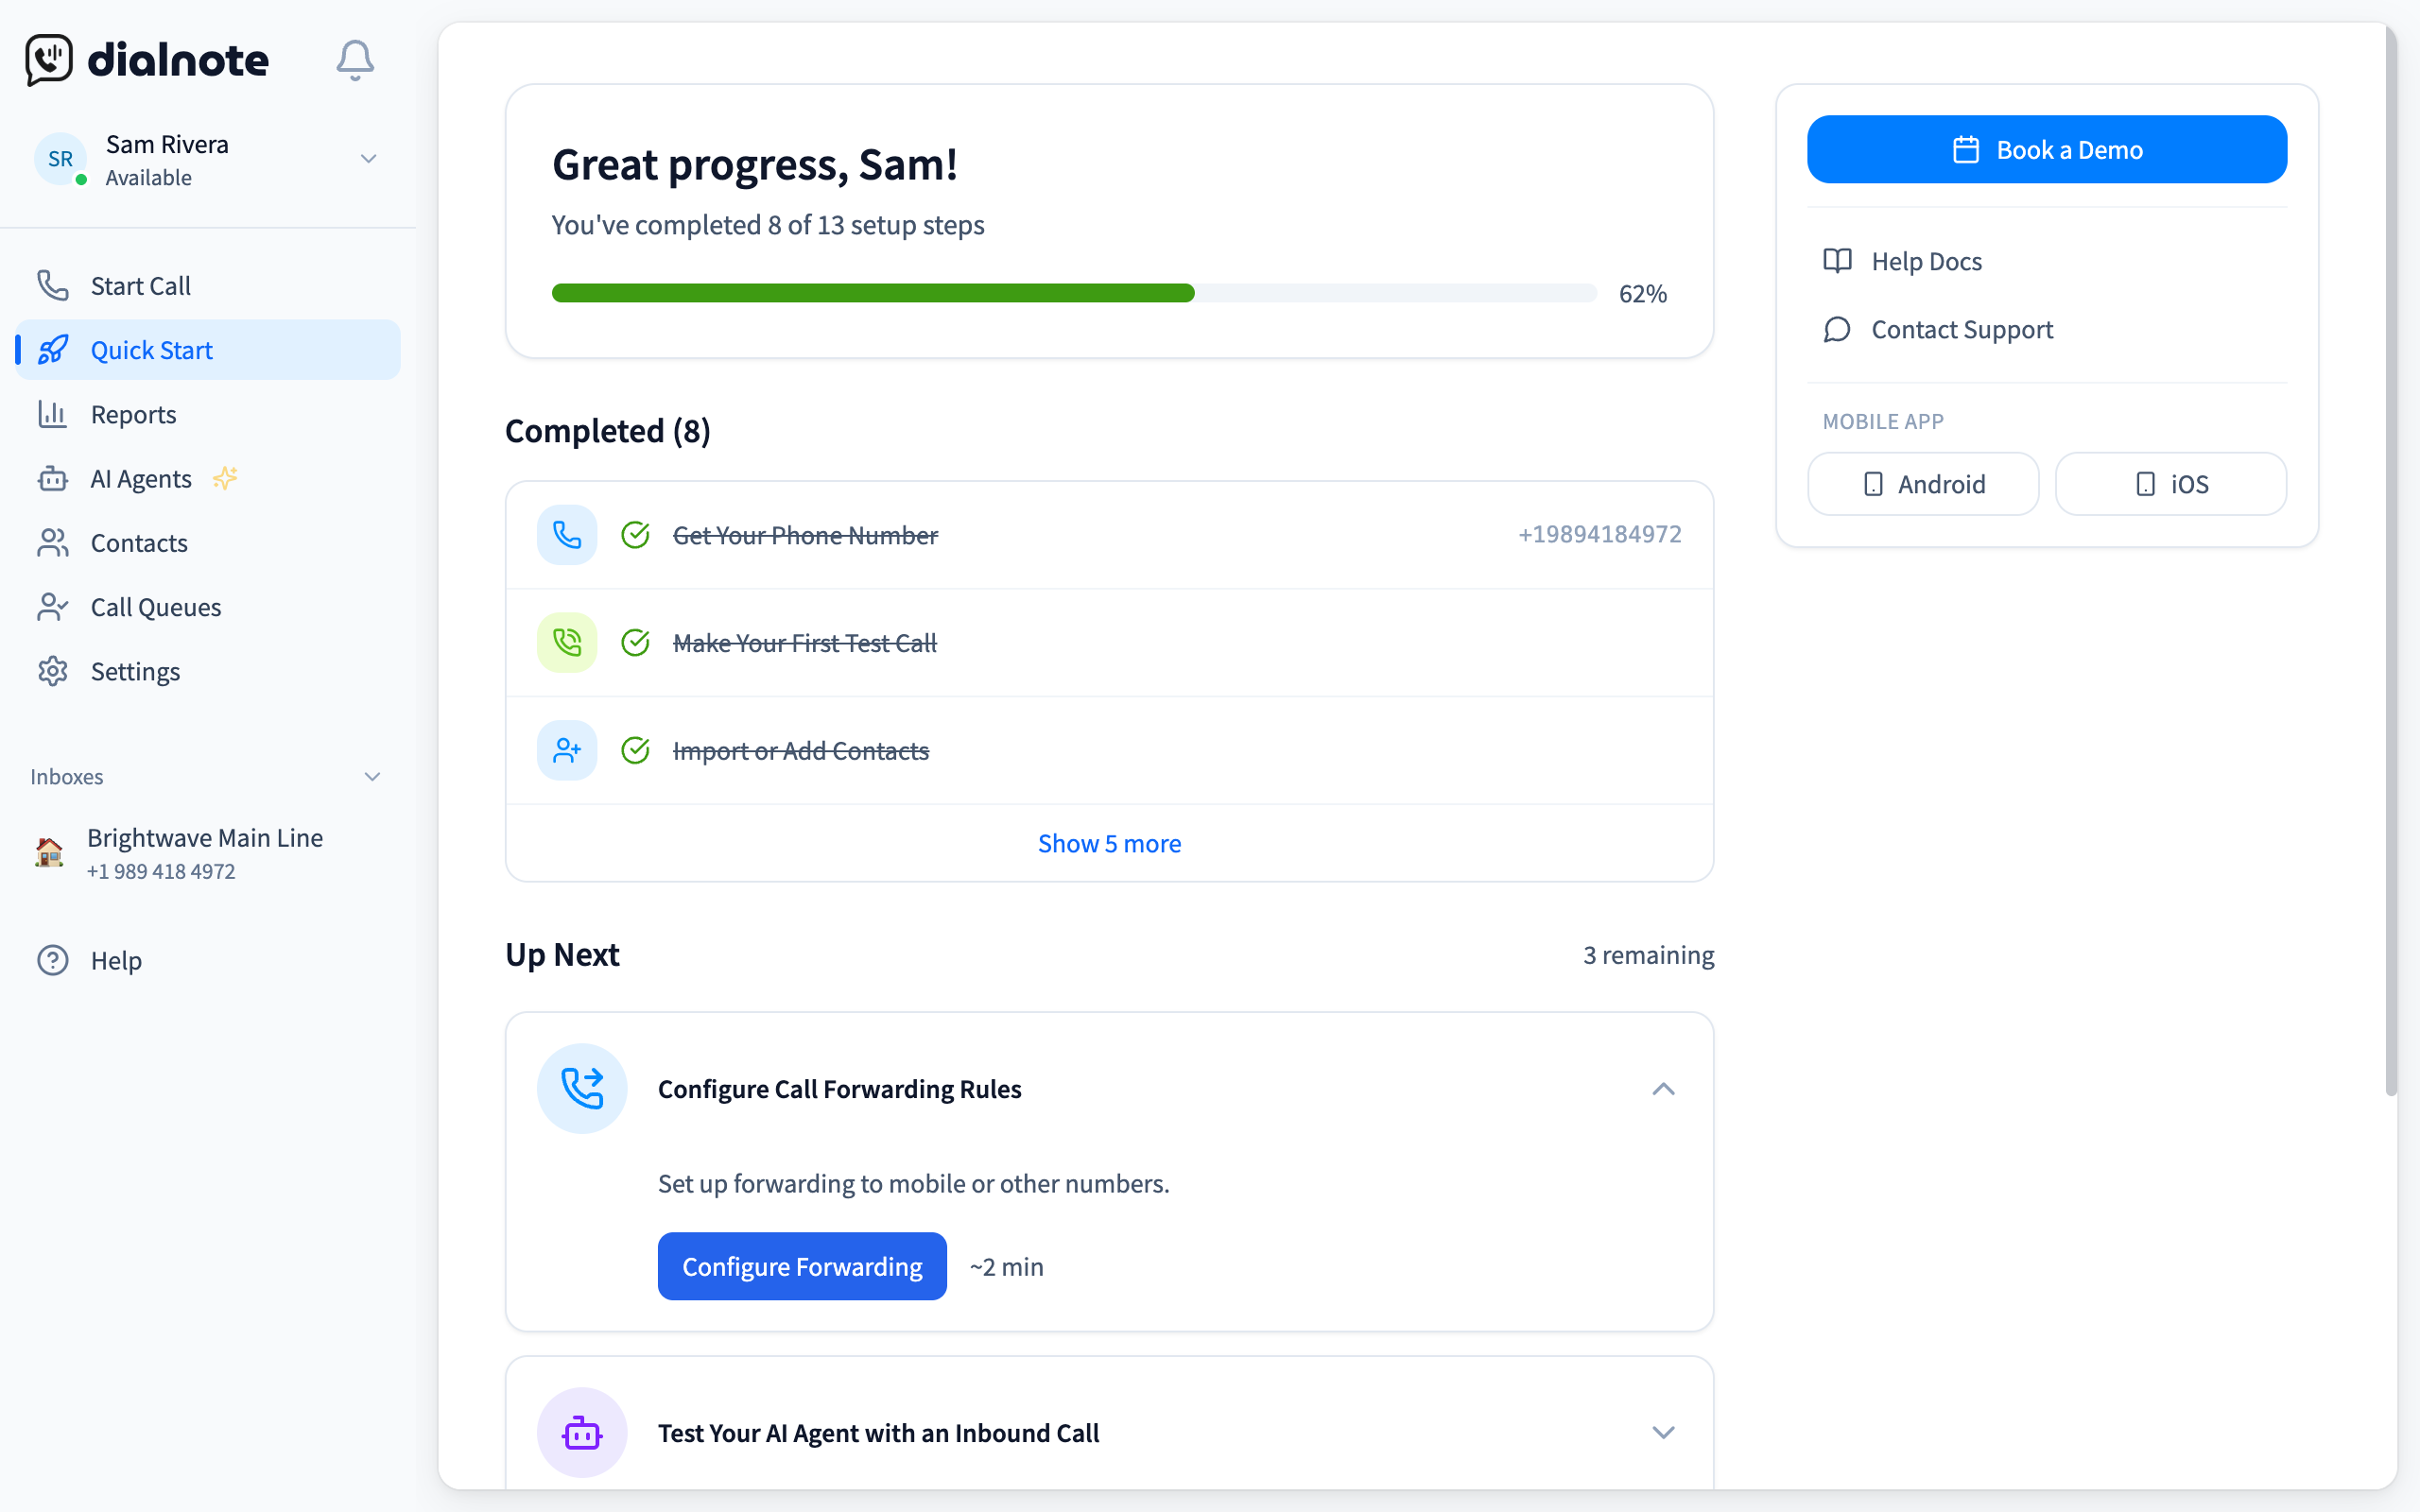
Progress tracking
dialnote automatically detects when you complete tasks. Make a call, set up an AI agent, or invite a team member—your progress updates instantly. There's no "mark complete" button; it all happens in the background.
How the Page Is Organized#
The Quick Start page has three main sections:
Your Plan — A short list of up to 3 recommended tasks, picked based on your onboarding questionnaire answers. The first incomplete task auto-expands so you can jump right in. When you finish a task, a "Next Step" prompt appears briefly to guide you forward.
Completed — Tasks you've already finished. If you've knocked out 6 or more, the list collapses with a "Show more" toggle.
Explore All Features — Every remaining task grouped by category (Essentials, AI & Automation, Call Routing, Team, Integrations). Browse these to discover features you might not have tried yet.
Your First Three Tasks#
Every new account starts with three essential tasks. Complete these first before moving on to advanced features.
1. Get Your Phone Number (~1 min)#
Click Get Phone Number to choose a local or toll-free number for your business. You can search by area code, city, or specific digits. Once claimed, this number is yours—all calls and texts go through it. See Getting Numbers for details.
2. Make a Test Call (~30 sec)#
After getting your number, test it out. Click Make a Call Now to open the dialer and call any phone (including your personal cell). This helps you experience HD voice quality and confirms everything works. Check out Your First Call for a full walkthrough.
3. Import Your Contacts (~2 min)#
Bring in your existing contacts so dialnote recognizes who's calling. You can upload a CSV file with bulk contacts or add people manually. This turns unknown numbers into named callers and helps you track call history per contact. See Import & Export for CSV formatting details.
Setting Up Your AI Voice Agent#
Once the essentials are done, dialnote recommends setting up an AI agent (~3 min). This virtual receptionist answers calls 24/7—even when you're busy or after hours.
To configure your AI agent:
- Go to AI Agents in the sidebar
- Click Configure AI Agent
- Add your business info (name, hours, common questions)
- Upload documents to your knowledge base (FAQs, pricing, service descriptions)
Two more AI tasks follow: Test Your AI Agent (~2 min) lets you call in and hear how it handles a real conversation, and Review Your First AI Call Summary (~1 min) shows you the auto-generated transcript, summary, and action items after a completed call.
Test before going live
After setup, call your business number from another phone to hear how the AI handles incoming calls. You can tweak the responses based on what you hear.
Configuring Call Routing#
dialnote offers flexible call routing so calls reach the right person at the right time. Three Quick Start tasks cover this:
Business Hours (~2 min): Define when your business is open. Calls during these hours ring your team directly. After hours, they can go to voicemail, forward to a mobile number, or route to your AI agent.
Call Flow / IVR (~5 min): Set up an interactive menu ("Press 1 for sales, 2 for support") to route callers to specific departments or team members. You can also mix in AI agent handling and after-hours rules.
Call Forwarding (~2 min): Forward calls to external numbers like your personal cell when you're away from your desk.
Team Collaboration#
If you're working with a team, dialnote makes it easy to collaborate:
- Invite Team Members (~1 min): Add unlimited users at no extra cost. Each person gets their own extension and can handle calls independently.
- Set Up a Shared Number (~1 min): Create department numbers where calls ring multiple people at once—great for sales or support teams.
- Try Internal Threading (~1 min): Leave private notes on conversations for your team. These notes don't appear to customers but help everyone stay on the same page.
Connecting Integrations#
The final Quick Start task is connecting your CRM (~3 min). dialnote works with the tools you already use:
- CRM Integration: Connect HubSpot, Salesforce, or Pipedrive to automatically log calls and sync contact data.
- Calendar: Link Calendly or Cal.com for appointment scheduling through your AI agent.
Task Cards and Prerequisites#
Each task card shows a time estimate and expands to reveal setup steps. Cards also display "Solves:" tags that show which of your pain points the task addresses—so you can see exactly why dialnote recommends it.
Some tasks have prerequisites. For example, you can't test your AI agent until you've created one, and you can't review an AI call summary until you've had an AI-handled call. Locked tasks show a message explaining what to do first.
Personalized Recommendations#
During account setup, dialnote asks about your biggest phone system challenges—things like missed calls, routing issues, or lack of call tracking. The Quick Start page uses those answers to personalize your experience.
If you told dialnote that missed calls are a problem, the AI agent setup card changes its headline to "Set Up an AI Agent to Catch Your Missed Calls" and explains how the AI answers 24/7. If routing is your pain point, the call flow task highlights how it helps callers reach the right person.
Personalization works automatically
You don't need to do anything extra. dialnote reads the pain points you selected during onboarding and adjusts task descriptions and priority order to match your needs.
These contextual recommendations apply to tasks in the AI & Automation, Call Routing, and Team categories. Essential tasks (get a number, test call, import contacts) stay the same for everyone since they're required regardless of your use case.
Progress and Completion#
Your progress shows as a percentage in the header, and the greeting updates as you go:
- Just starting — "Welcome, [name]! Let's get your phone system set up."
- A few tasks done — "Nice start, [name]!"
- Halfway there — "Great progress, [name]!"
- Almost done — "Almost there, [name]!"
- All complete — "Congratulations, [name]!" with a green banner showing your business number and a copy-to-clipboard button
When you finish all tasks, a "Go to Dashboard" button takes you to your Inbox where you can manage calls and conversations going forward.
Invited Team Members#
If you've been invited to a dialnote workspace (rather than creating it yourself), you'll see a shorter set of 6 tasks focused on personal setup:
- Get your phone number
- Make a test call
- Test the AI agent
- Review an AI call summary
- Import contacts
- Try internal threading on a conversation
Org-level tasks like configuring IVR, setting business hours, and connecting integrations are handled by workspace owners and admins. You'll see a "Your phone system also includes" section listing those features so you know what's available—but setup is managed by your admin.
Sidebar Help#
The sidebar on the Quick Start page gives you quick access to:
- Book a Demo — Schedule a walkthrough with the dialnote team (shows your scheduled date/time once booked)
- Help Docs — Jump to the documentation
- Contact Support — Email the support team directly
- Mobile App — Download links for Android and iOS
What's Next#
Once you've completed the Quick Start tasks, explore these areas to get the most out of dialnote:
- Phone System — Manage numbers, recording, and voicemail
- AI Agents — Fine-tune your agent with custom tools and call scoring
- Analytics — Track call reports and team performance
- Messaging — Send and receive SMS from your business number