Webhooks let you send call events from dialnote to your own systems or third-party services in real-time. When a call ends or a recording completes, dialnote can instantly notify your server, CRM, or automation platform.
You can set up webhooks to Zapier or any custom HTTPS endpoint. This opens up possibilities like syncing call data to your database, triggering follow-up workflows, or updating external systems automatically. Prefer a no-code tool? Make and n8n both accept dialnote webhooks too.
Setting Up a Webhook#
Go to Settings → Webhooks to manage your webhook configurations. Click Add Webhook to create a new one.
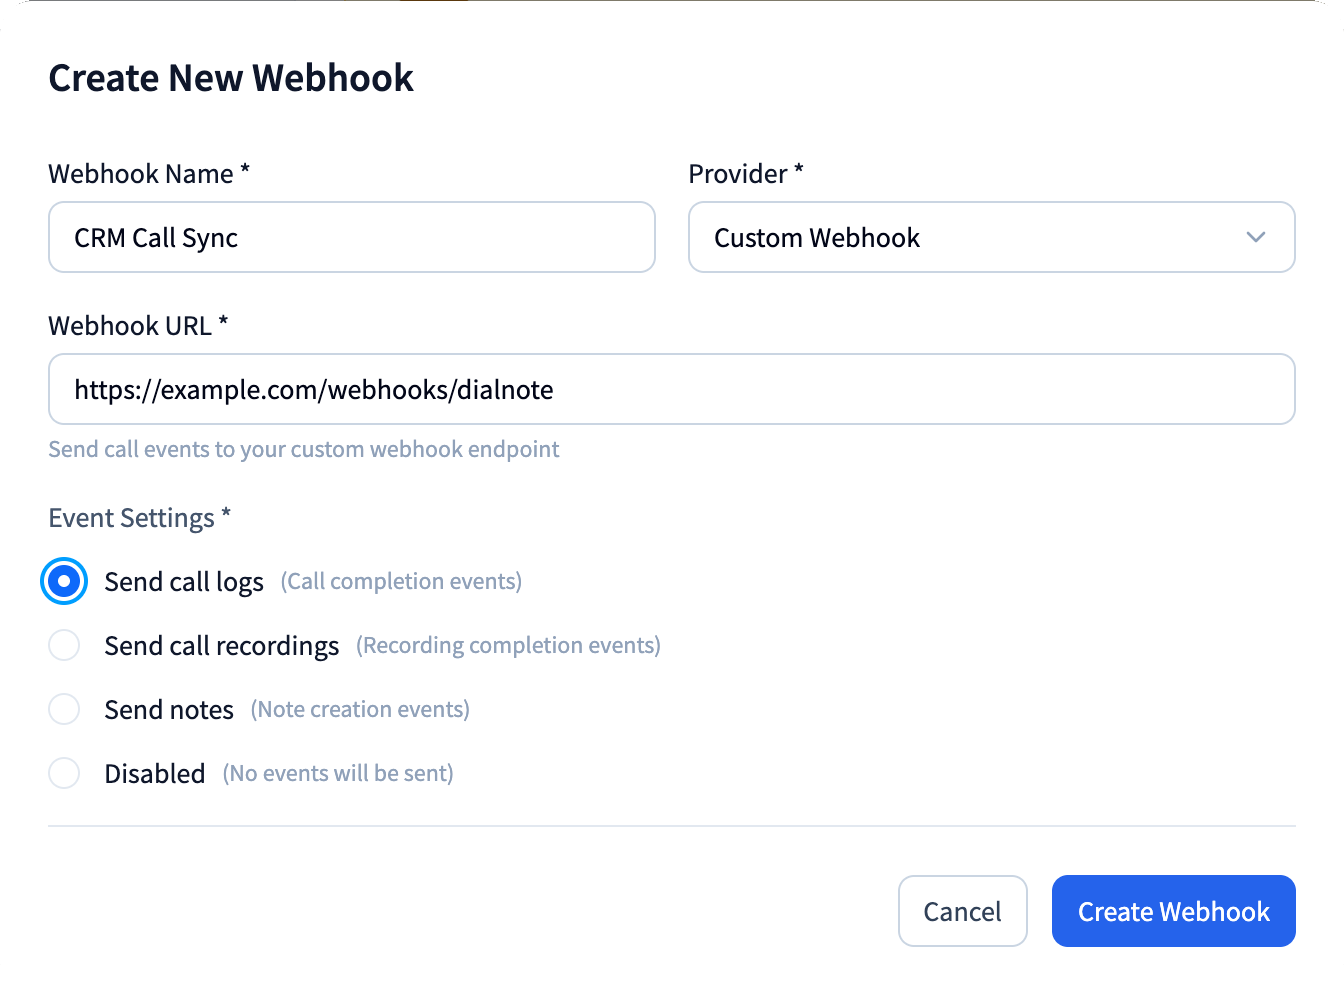
Each webhook needs:
- Name: A descriptive label, up to 100 characters (e.g., "CRM Call Sync" or "Lead Alerts")
- Provider: Choose Zapier or Custom Webhook
- Webhook URL: The HTTPS endpoint where dialnote sends events
- Event Settings: Which event triggers the webhook
HTTPS Required
Webhook URLs must use HTTPS. dialnote won't send events to HTTP endpoints for security reasons.
Event Types#
Each webhook sends one event type. Under Event Settings, pick the option you want:
| Option (in app) | What fires |
|---|---|
| Send call logs | A call ends — payload includes duration, direction, and status |
| Send call recordings | A call recording is ready — payload includes the recording URL |
| Send notes | A team member adds a note to a conversation |
| Disabled | Nothing is sent (handy for pausing a webhook without deleting it) |
Because each webhook carries a single event, create one webhook per event type if you need calls, recordings, and notes going to the same or different destinations.
One event per webhook
The event picker is a single choice, not a set of checkboxes. Switching from "Send call logs" to "Send call recordings" replaces the event — it doesn't add a second one.
Zapier Integration#
If you're using Zapier, dialnote provides built-in support. The Zapier webhook URLs (starting with hooks.zapier.com) work automatically.
To connect with Zapier:
- Create a new webhook in dialnote with provider set to Zapier
- Get your Zapier API key by clicking Show Key in the Zapier Integration section
- Use this API key in the
X-DIALNOTE-API-KEYheader when setting up webhook subscriptions in Zapier
Zapier-provider webhooks also carry an X-DialNote-Provider: zapier header so your Zap can tell dialnote traffic apart from other sources.
Zapier API key
The Zapier API key is unique to your organization. Keep it secure and don't share it publicly. For the full Zap setup walkthrough, see the Zapier integration guide.
Custom Webhooks#
For custom integrations, set the provider to Custom Webhook and enter your server's endpoint URL. dialnote sends JSON payloads with the event data.
Webhook Security#
Each webhook gets a unique secret (starting with whsec_). dialnote includes an HMAC signature in the X-DialNote-Signature header with every request.
To verify webhook authenticity on your server:
const crypto = require('crypto');

function verifySignature(payload, signature, secret) {
  const expectedSignature = 'sha256=' +
    crypto.createHmac('sha256', secret)
      .update(JSON.stringify(payload))
      .digest('hex');

  return signature === expectedSignature;
}
Always verify signatures before processing webhook payloads in production.
Payload Format#
Webhook payloads include standard fields:
{
  "id": "unique-event-id",
  "type": "call.completed",
  "timestamp": "2024-01-15T10:30:00Z",
  "organizationId": "your-org-id",
  "data": {
    "callSid": "call-id",
    "direction": "inbound",
    "phoneNumber": "+15551234567",
    "status": "completed",
    "duration": 180
  }
}
The data object varies based on event type but always includes relevant call or recording details.
Testing and Troubleshooting#
Click the Test button on any active webhook to send a sample payload. This helps verify your endpoint is reachable and properly configured.
Test payload shape
The test payload is a fixed sample with event_type set to test.webhook and a test: true flag. Its shape differs slightly from real event payloads, so use it to confirm connectivity — not to model your parsing logic. Build your parser against the real payload format shown above.
Auto-Disable on Failures#
dialnote tracks delivery failures for each webhook. If a webhook fails 3 consecutive times, it's automatically disabled to prevent repeated failed requests.
When a webhook is disabled due to failures:
- The card shows the failure count and last error message
- An Enable button appears to reactivate it
- Fix the underlying issue before re-enabling
Common failure reasons:
- Endpoint URL changed or is unreachable
- Server returning non-2xx status codes
- Request timeout (30 second limit)
Monitoring Deliveries#
Each webhook card shows:
- Last sent: When the last successful delivery occurred
- Failure count: How many consecutive failures (resets on success)
- Last error: The most recent error message if any
Timeout limit
Your endpoint must respond within 30 seconds. For long-running processes, acknowledge the webhook quickly and process asynchronously.
Managing Webhooks#
From the webhook management page you can:
- Edit: Update the name, URL, or event settings
- Test: Send a test payload to verify connectivity
- Delete: Remove a webhook permanently (can't be undone)
- Enable: Reactivate a webhook that was auto-disabled
The webhook secret can't be changed from the app after creation. If you need a new secret, delete the webhook and create a new one.
What's Next#
- Zapier integration — connect calls and recordings to 6,000+ apps without writing code
- Make and n8n — build visual automations on top of dialnote webhooks
- CRM integrations — push call activity straight into HubSpot, Salesforce, or Pipedrive without a custom endpoint