Adding Contacts
dialnote gives you multiple ways to build your contact list. You can add contacts one at a time during conversations, create them from the Contacts page, or import hundreds at once from a CSV file. Pick the method that fits your workflow.
Adding a Single Contact#
The fastest way to add a contact is right from your inbox. When you're viewing a conversation with an unknown number, click the Create Contact button in the contact details panel. dialnote pre-fills the phone number so you just need to add the person's information.
You can also add contacts from the dedicated Contacts page:
- Go to Contacts in the sidebar
- Click the Add Contact button in the top right
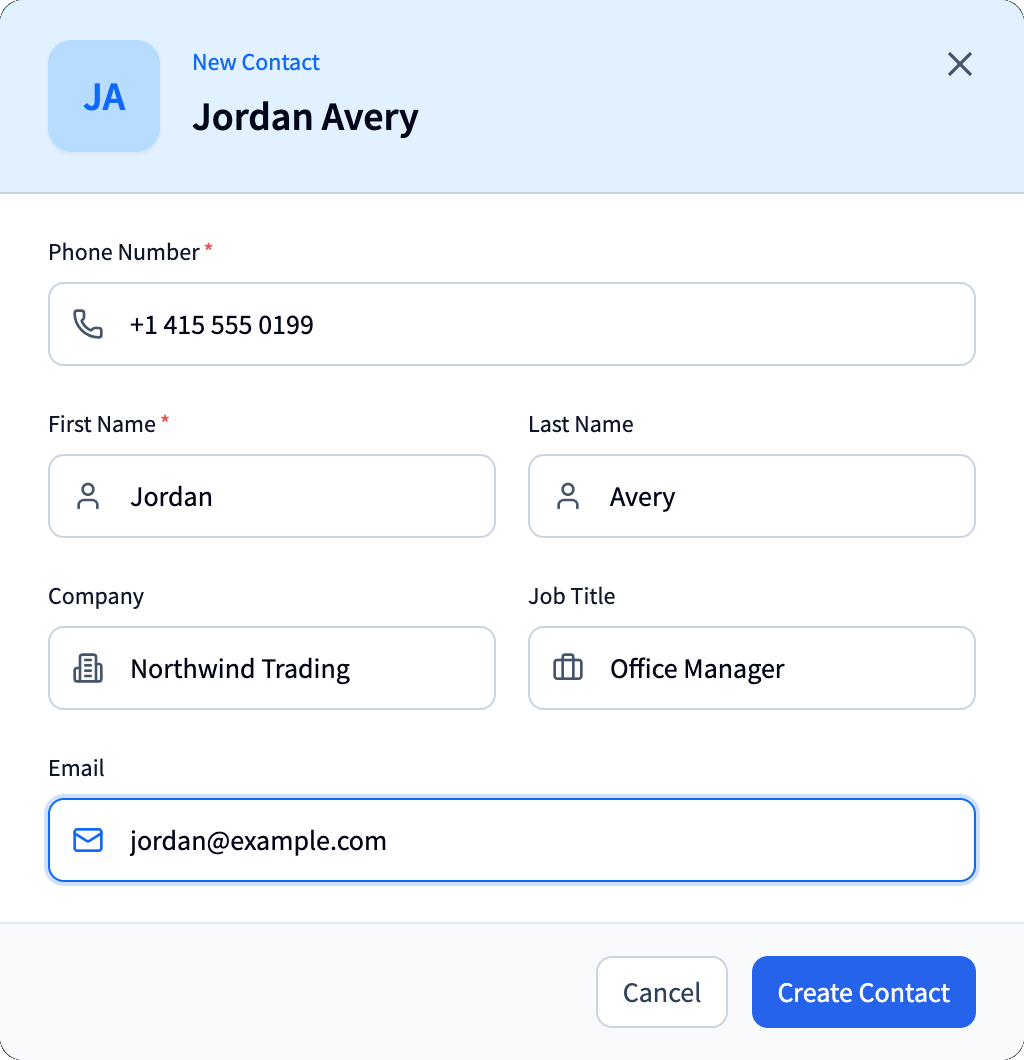
- Fill in the contact details:
- Phone Number (required) - Include the country code, like +1 for US numbers
- First Name (required) - The contact's first name
- Last Name - Optional but helpful for searching later
- Company - Where they work
- Job Title - Their role at the company
- Email - Their email address
- Click Create Contact
Pro tip
When you add a contact from a conversation, dialnote automatically links all past calls and messages with that number to the new contact record.
Importing Contacts from CSV#
Got a spreadsheet of contacts? Import them all at once instead of typing each one manually.
Preparing Your CSV File#
Your CSV file should include these columns:
| Column | Required | Description |
|---|---|---|
| phoneNumber | Yes | Contact's phone number with country code |
| firstName | No | First name |
| lastName | No | Last name |
| No | Email address | |
| company | No | Company name |
| jobTitle | No | Job title or role |
Phone number format
Phone numbers should include the country code. dialnote accepts formats like +14155551234 or +1 (415) 555-1234.
Running the Import#
- Go to Contacts and click Import
- Download the sample CSV template if you need a starting point
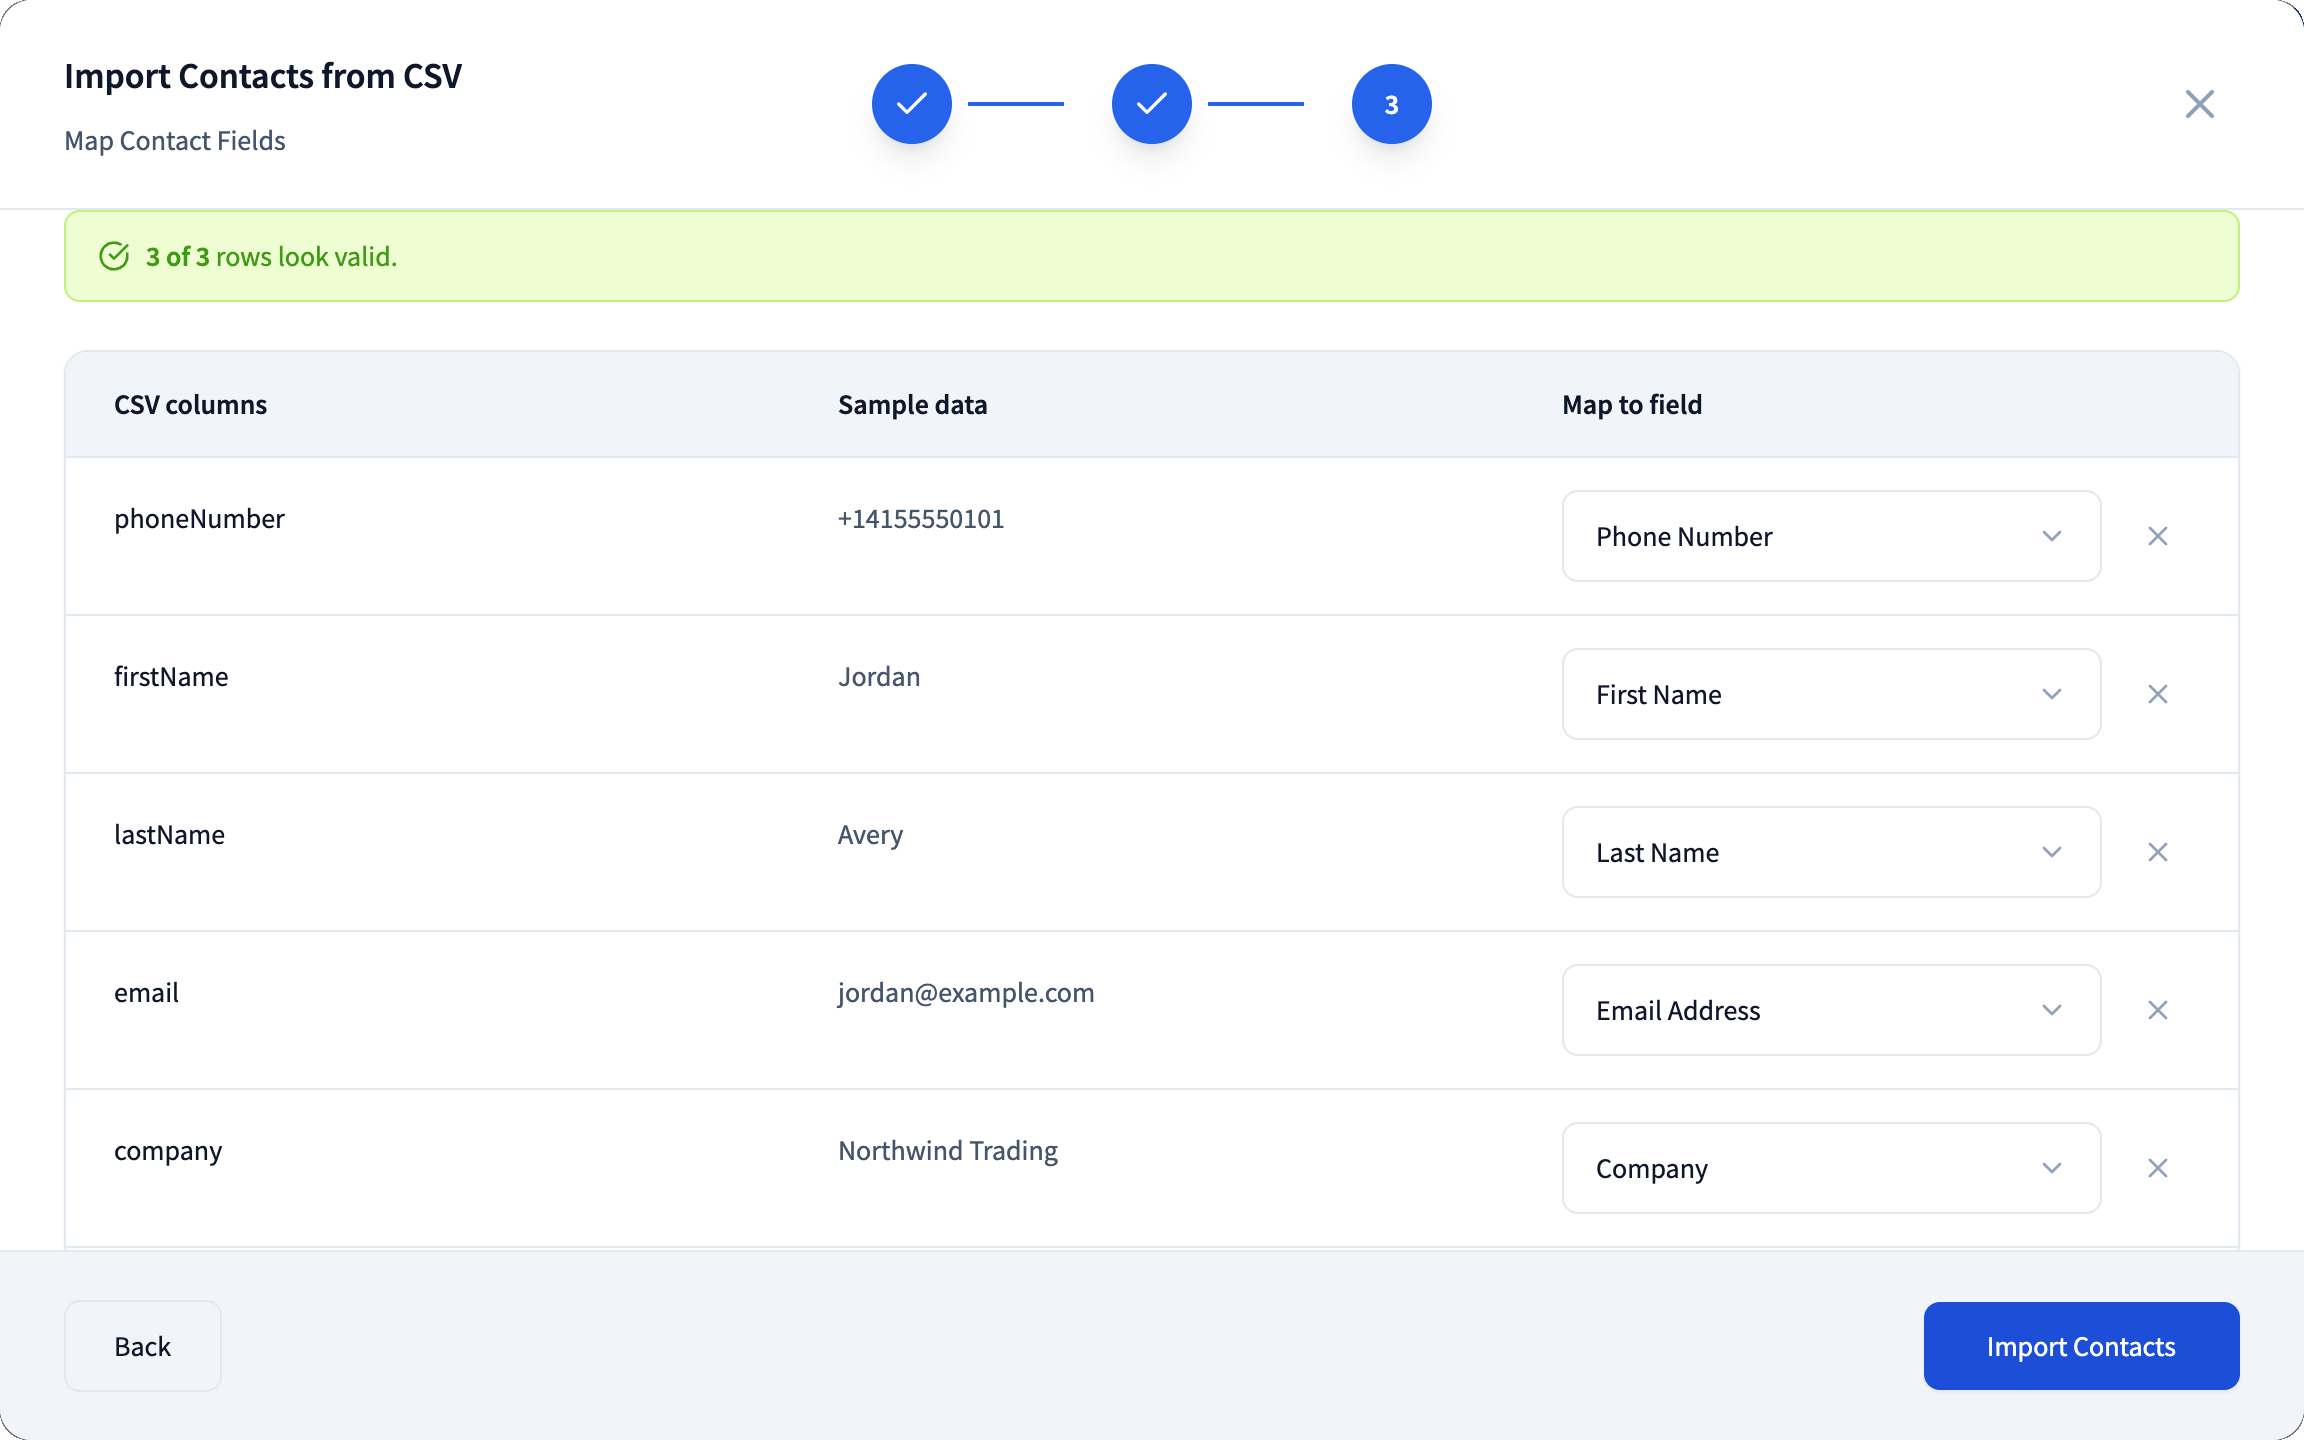
- Upload your CSV file (max 10MB)
- Map your CSV columns to dialnote fields - drag and drop to match them up
- Preview the first few rows to make sure everything looks right
- Click Import Contacts
After the import finishes, you'll see a summary showing:
- How many contacts were created
- How many duplicates were skipped
- Any rows that failed with error details
Handling Duplicates#
dialnote uses phone numbers as the unique identifier. If you try to import a contact with a phone number that already exists, that row gets skipped. The existing contact stays unchanged.
Auto-Created Contacts#
When someone calls or texts your dialnote number for the first time, the system doesn't automatically create a contact. Instead, you'll see the phone number in your inbox. This lets you decide which callers deserve a spot in your contact list.
To convert an unknown number into a contact:
- Open the conversation in your inbox
- Look at the contact panel on the right side
- Click Create Contact
- Add their details and save
Duplicate prevention
If you try adding a contact with a phone number that already exists in your account, dialnote will show an error. Search for the existing contact instead of creating a duplicate.
What Happens After Adding a Contact#
Once you create a contact, dialnote does a few things automatically:
- Links conversation history - All previous calls and messages with that number appear in the contact's timeline
- Enables name display - The contact's name shows up in your inbox instead of just their phone number
- Prepares for notes - You can now add notes to the contact record that persist across conversations
Your new contacts show up in the Contacts list immediately. You can edit them anytime by clicking on their row in the table or opening a conversation with them.